Flow of using FlashAir IoT Hub
Latest update: April 2018
FlashAir IoT Hub can be easily started by anyone with FlashAir.
Let's start the FlashAir IoT Hub by following the steps below.
If Lua script has not been updated, measurement value function and GPIO function can not be used.
Preparation
1. Preparation of development environment
You can use it with a browser and a text editor.
2. Getting FlashAir
FlashAir models available for FlashAir IoT Hub are "W-03" and "W-04".
The Toshiba FlashAir is available both online and in electronics stores.
3. Supplemental Information
- Using Station Mode
- By default, the FlashAir works as a Wireless LAN Access Point (Infrastructure Mode). This means that while
your machine
is connected to the FlashAir, you won't be able to access Internet via Wireless LAN. However, if you have
another
Wireless LAN Access Point, FlashAir can work as a Wireless LAN Client (Station Mode). If you connect the
FlashAir
to a common Wireless LAN Access Point with your development environment, you can access both the FlashAir and
Internet
simultaneously.
Please refer to Advanced Tutorial #1: Station Mode for more details. - Longer Timeout
- FlashAir stop its Wireless LAN functionality to save the power consumption if no communication through
Wireless LAN
for some while. It is usual case in development phase. You can change the timeout length to stop Wireless LAN.
Please refer to CONFIG Reference: Set connection time-out period for more details.
Flow of use
Register / Login
To use it for the first time, you need to register an account. Please register your account by entering your e-mail address and password from the top page of FlashAir IoT Hub.

When registering with FlashAir IoT Hub, confirmation e-mail will be sent to registered e-mail address, so if you access the URL described in e-mail, registration will be completed.
You can log in with the e-mail address and password you registered from the next time.
Also, if you have a corresponding external site account, you can log in with the account you have without registering to FlashAir IoT Hub.
As of October 18, 2016, the external sites that are compatible with login are as follows.
- Yahoo! JAPAN
FlashAir Registration
After registering with FlashAir IoT Hub, please register your FlashAir * 1 by the following procedure.
* 1: The models that can be used with FlashAir IoT Hub are "W-03" and "W-04". Please check the description of FlashAir card, package, instruction manual.
1 Acquire the access token and Lua script and save it in FlashAir
Click "Register FlashAir".

- Select "Get an access token" and download the file (access token) on the PC. * 2
- Select "Script" at the top of the site and download and decompress the ZIP file on the PC.
- Save the downloaded / decompressed file in FlashAir's root directory. * 3
2 Connect FlashAir to wireless LAN
Edit the FlashAir CONFIG file. For details of the CONFIG file, please check CONFIG.
Set FlashAir to station mode. For details, please check Using Station Mode.
At the same time, please set the execution setting (LUA_RUN_SCRIPT = /bootscript.lua) of the script and its setting (IFMODE = 1) when using the GPIO.
An example of CONFIG setting is shown below.
CONFIG setting example
[Vendor]

CIPATH=/DCIM/100__TSB/FA000001.JPG
APPMODE=5
APPNETWORKKEY=********
VERSION=FA9CAW3AW3.00.01
CID=XXXXXXXXXXXXXXXXXXXXXXXXXXXXXXXX
PRODUCT=FlashAir
VENDOR=TOSHIBA

MASTERCODE=XXXXXXXXXXXX
LOCK=1
APPSSID=flashair
APPNAME=flashair
IFMODE=1                       # GPIO settings
LUA_RUN_SCRIPT=/bootscript.lua # Script execution setting
Remove and reinsert FlashAir to reflect the setting and registration will be completed if the wireless LAN connection to the access point is successful.
Use FlashAir IoT Hub
After registering FlashAir, let's use FlashAir IoT Hub.
In the initial state, the script (bootscript.lua) sends the measured value of the sample to FlashAir IoT Hub every ten seconds.
After confirming the operation in the initial state, please edit according to the purpose.
Trigger
Display the data received from FlashAir.
GPIO input
Displays the input value of GPIO connected to FlashAir with High or Low.

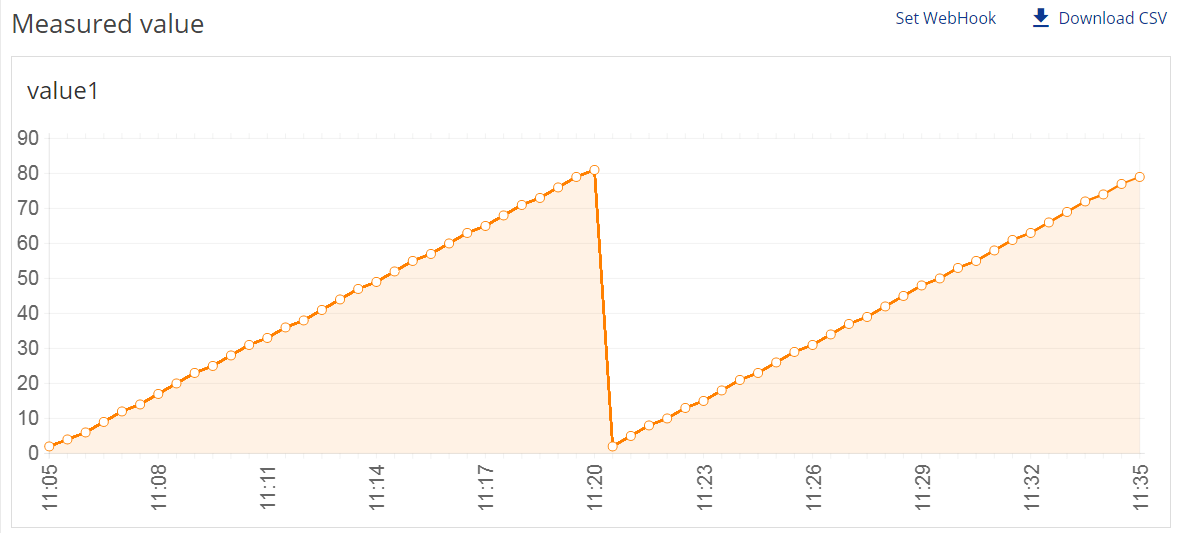
Measured value
The measured value sent from FlashAir is displayed on the graph.

Up to five measurement values can be used, and labels of each graph can be edited and saved.

In addition, the measured value can be downloaded with CSV.
Action
You can send commands to FlashAir in units of jobs.
Multiple jobs can be registered, and the jobs are executed sequentially from the jobs registered earlier.
GPIO output
You can set the output value of GPIO connected to FlashAir and send it to FlashAir.

Execute Script
You can run the Lua script on FlashAir.
The script can specify JSON format arguments.

Waiting jobs
This is a list of jobs executed by FlashAir.
Displays the job execution status and success or failure of execution.

Image
A list of images uploaded from FlashAir.
You can also download images from FlashAir IoT Hub.

 FlashAir™ Developers